I’m pretty eager to provide things for my kids when I can see they have an interest in something. Both of them are smack-bang in “little mother” territory, each having a little doll and related paraphernalia for them to feed, change and clothe them. But when I had to get rid of the miniature cot because it was too easy to take apart and make a weapon from the metal legs, the girls had nowhere for dolly to sleep.
I do have to hold myself back a bit from going straight for a bought version of things (there is SO MUCH cute stuff out there these days!) – I made plenty of things from scratch as a kid, and it worked just as well as a bought version (or so I tried to tell myself). I am keen for my kids to learn to think first “how can I make that?” rather than “muuuuuuuuuum buy me one from the shoooooooooppppp”.
I had plenty of Australia Post mailing boxes in the cupboard, and thought they would make perfect beds for the babies, as the dolls were slightly too big for your general shoe-box kind of bed. A bit of cutting and paint later, and two very happy toddlers had somewhere for their dollies to lay their heads. I tried to put a little cushion in each for a mattress, but was told “no” in no uncertain terms.
Step one: cut the lid off one box.
Step two: realise one of the toddlers has taken off their pants. Decide it’s unimportant.
Step three: cut off the lid from the other box.
Step four: remove one toddler from powerpoint area.
Step five: move sharp knife away from the edge of the bench where you left it when you went to retrieve powerpoint child.
Step six: realise your coffee has gone cold.
Step seven: let the kids play with the beds until naptime, when you will paint them out of the way of prying eyes, fingers, and someone upsetting the cup of water.
Step eight: watch the younger toddler copy everything the older toddler does, including kissing the dolly good night. Decide you have the cutest children in all the land, and all must be made aware of it.
Step nine: Put on a load of washing and tidy up in the four minutes you’ve got left to get stuff done before they get bored of the activity.
Step ten: microwave your coffee.
Step eleven: trip over one of the beds that a kid has left directly next to your feet and gone to play with something else.
Step twelve: when kids are asleep, bust out the paint set. Get busy trying to get it all done before they wake up.
Step thirteen: kids wake up early and will not take no for an answer when they want to paint.
Step fourteen: sigh.
By all means let them paint the beds yourself, if you can stand that sort of thing. I was a bit selfish and wanted to get my paint on.
Step fifteen: Leave to dry overnight. The beds, not the kids. The kids are gonna need a bath.
Step sixteen: show to the kids, who think it is Christmas. Elder one says “Fank you very much, mummy! Oh it’s perfect!”
Step seventeen: that’s just something in your eye, don’t worry.
Step eighteen: realise they’re not as pretty as you were hoping they would turn out. Decide it’s unimportant, as the kids care about zero percent.
Step nineteen: realise you should have taken EVERY SINGLE BIT OF STICKY TAPE OFF the boxes before you painted them. Because now the dried paint that is on all the shiny tape is falling off in flakes all. over. your. house. for. days.
Step twenty: watch the elder toddler rock her baby and sing it a song while you sweep up orange paint flakes. It is wayyyyy too cute.
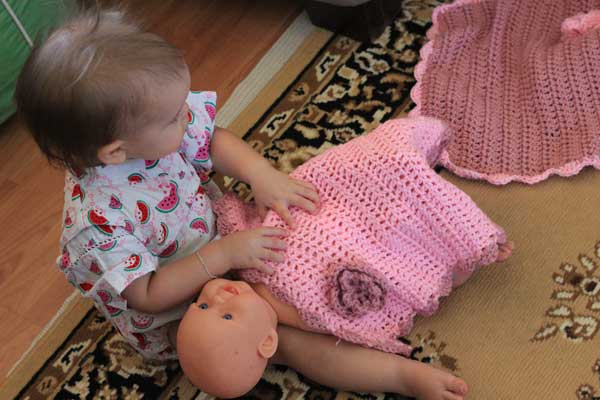
Step twenty-one: at night, after the children have gone to bed, crochet two little blankets for the dollies while watching The X-Files (The X-Files part is important. Don’t skip that bit.) You can make them different colours, but I had these two yarn balls to use up.
You will need:
1 x 100g 8ply yarn (or two balls if you are doing different colours/edges). I used Panda Magnum soft.
5mm hook
Pattern:
Blanket: Chain 41.
Row 1: dc in each chain to end. Ch 1, turn.
Row 2: dc in each stitch to end. Ch 1, turn. Repeat 22 more times (for a total of 24 rows). Feel free to make it longer if you need to, depending on dolly bed size.
Border: Just before the corner, attach new yarn. Sl st in first stitch, hdc in next stitch, three dc in corner stitch, hdc in next, sl st.
Continue around the blanket: sl st, hdc, three dc, hdc, sl st. This will create a little wave.
decoration: I always use this flower pattern. For everything. Can’t help it! But feel free to improvise.
Realise eventually they’re probably going to need a proper dolly bed, and so buy a lovely handmade second-hand one from a lady on Gumtree. Wrap it up for Christmas. Throw out the cardboard ones when the PAINT FLAKES OMG get too much to handle 😉
It was the middle of February and I'd just come home from being away for…
I'm assuming newslettering is the new blogging these days - everybody's doing it! Your mum's…
So I struggled to get my jeans on yesterday morning, and struggled to keep them…
Well, here we are. Hunkered down in our houses, trying to work, or wrangle kids,…
Well hello. Today was one of those days where we didn't do much at all,…
Well, would you look at that! We survived two days! We kept occupied, learned some…