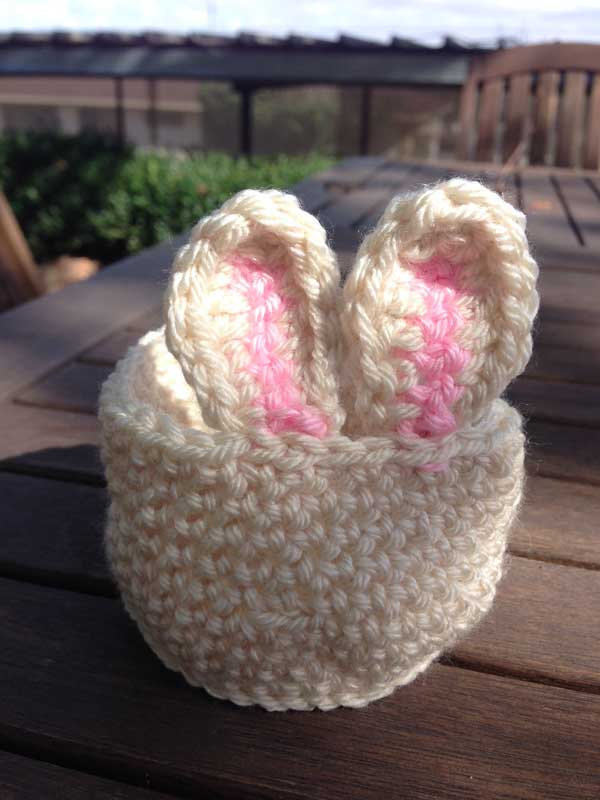
 Isn’t he a cutie?
I thought it would be fun to knock up a sweet little crochet Easter bunny basket for each of my girls this year, to hold some tiny eggs or one medium-sized one. I could imagine the look on their faces Easter morning! Cute crochet would have to be the best thing ever invented.
These don’t take long at all, and are very beginner-friendly. I do usually steer clear of small fiddly projects (hence I’ve never done any amigurumi although I think it’s awesome), but this is a pretty simple project that doesn’t require too much faffing about.
You can also keep the face pretty simple (I still don’t know if I want to keep the whiskers, I’m leaning toward not), or embellish the whole damn thing as much as you want. Easter goodies mandatory, however.
Free Crochet Pattern: Easter Bunny Baskets
What You’ll Need:
3.5mm crochet hook
3 balls 8ply yarn – one main colour, one pink for accents, and one black for eyes.
Instructions:
Basket body
1. Chain 5, join with slip stitch.
2. 8 sc in loop.
3. Ch1. *2sc in stitch, 1 sc in next*. Repeat around all 8 stitches, sl st to join. (11)
4. Ch 1. *2sc in stitch, 1 sc in next*. Repeat around. sl st to join.(18)
5. Ch 1. *2sc in stitch, 1 sc in next*. Repeat around. Sl st to join. (27)
6. Ch 1. *2sc in stitch, 1sc in next*. Repeat around. Sl st to join. (39)
7. The bottom of the basket should be sufficiently increased, so Ch 1 and sc in each. Sl st to join. (39)
It should look like this.

The back will look like this:

I don’t like the look of the back, so we’re going to use that as the bottom of the basket, and the right side will be what you see when you look into the basket. So you can either fasten off, turn around, and start building the walls of your basket, or you can flip it all around and work the opposite way from the way you’ve just come. This will ensure the right side is seen when you look into the basket, but the right side of your walls will also be facing out.

Scuse the blurry pic, but for the foundation row of the basket sides, you’ll be working in the back loops only.
So with your right side of the bottom piece facing up, begin:
8. Ch 1. Sc in back loop only around, sl st to join. (39)
9. Ch 1. Sc in each stitch around, sl st. (39)
10. Repeat.
11. Repeat.
12. Repeat.
13. Ch 1. Ch 2 tog, sc in next 9. Ch tog the 10th and 11th stitch, the 20th and 21st, and 3o/31st with sc in each stitch in between (35). This is optional, but I like to do it to keep the walls reasonably tight.
14. Ch 1. Sc in each, sl st to join. (35)
15. Repeat.
16 Repeat.
17. Repeat.
Fasten off.
Easter Bunny Ear:
With your pink, ch 6. Sc in 2nd ch from hook, sc all the way across. Change colour.
With the body colour, work around the pink chain like this: sc, sc, dc, dc, sc, 3dc, sc, dc, dc, sc, sc, fasten off.
This will ensure your ears are long but also kinda rounded.
Handle:
You can make this as long as you like, and the rows will reflect that. I ch 7 and did as many rows as would cover a 1cm strip cut from the length of an A4 sheet of paper. That ended up being too long, so it’s up to you how long you’d like it.
In the ch 7, sc in the 2nd chain from hook, and sc along. Ch 1, turn, and sc across. Keep going until your handle is as long as you prefer.
Crochet the handle closed across the long side, enclosing the strip of thin cardboard inside. This is to reinforce the handle so it doesn’t flop when nobody’s holding it.

Stitch the handle to the basket. In a perfect world I would have put the folded side to the front, and the stitched-closed side to the back of the basket just because it would look neater, but I have two toddlers and can barely remember my own name most days. This was obviously beyond me.
Now for the face! Stitch anything you like on there. I did simple eyes and whiskers (not sold on the whiskers), and rubbed a felt pen on for rosy cheeks.


Just the right size for tiny eggs 🙂
Enjoy!

You cracked me up there with the comment about two toddlers and not remembering your name. I, like you, am glad to get a project all the way to Complete. Never mind if the dang seams are in the front. Who Cares ?~! Not the woober who loves that you made him/her a sweet basket of Love.
Thanks for the pattern. The paper in the handle is a superb solution to the floppy handle problem. Atta girl. I’ll be back.
Haha you made me laugh! Two woobers think these were great, and you’re right – they couldn’t care less about messy seams! Now, to finish their bonnets before their ears fall off from cold.
Oh man, that is ridiculously cute! I’ve come across quite a few gorgeous crochet projects today. I really, really need to learn how to crochet, I just can’t wrap my head around it. It’s like high school maths all over again. 😉
I find crochet miles easier than knitting. I think if you watch a youtube video, you’ll get it no worries. It really is easier to understand than reading and looking at drawings of where your hands should be (which is how I taught myself!)
So cute and so much prettier than the ones at the supermarket. I’m sending this post to my friend who can chrochet. I can’t. Should I attempt this?!
If you’ve never crocheted anything before, I’d start on something easier. But if you have a fair idea of what goes on, then give it a go!
These are absolutely adorable … if only i could crochet! I really need to learn.
I taught myself from things I found on the internet! Really! It was much easier than I expected x
Small pieces of pink felt would make cute cheeks too 🙂
That sounds like an amazing idea for organised people 😉